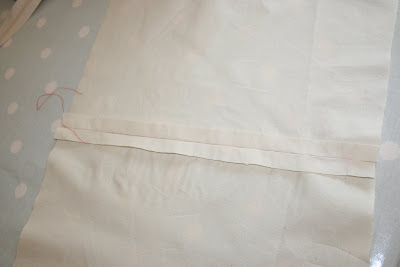
There are lots of different ways that zips can be used, but today I just thought we'd start off with inserting a zip into a cushion cover (unpiped).
The absolute key to inserting zips successfully is to arm yourself with a roll of continuous zip.
Yep, zips on a roll. It makes life so much easier because you don't have to worry about exact fits and measuring. You just trim off what you don't need. I get mine here but Ebay also sell and I tend to stay stocked with a roll of light beige and white which suits most projects. Later addition: You could of course buy a singular zip but make sure it's a longer length than you actually need.
So let's start. Sew about 5cm of stitching at each side of your cushion cover, allowing for approximately a 1.5cm seam allowance on each side. Reinforce the stitching at each end.
Then, hand sew tacking stitches inbetween the two rows of stitching and lightly press the seam open.
Seen from the other side........
Cut off a length of zip from your roll which is slightly longer than you actually need (ie longer than the gap in between the first 2 rows of stitching that you did.)
Now, lay the zip face down on top of the seam that you have created. Make sure you line up the teeth so that they are just below the seam line and pin into position or tack if you prefer.
Take your cover to your sewing machine. Make sure you are using a zipper foot and position the fabric so that you start sewing at the beginning of the zip opening or end of the row of stitching that you did at the start of this project. If you want to, mark this position with a pencil so you know exactly where to start.
Now take a swig of coffee, a deep breath, needle down, foot on the gas and off you go. Keep the stitching quite close to the zipper teeth.
Seen from the other side.......
Now stitch the other side, keeping the stitching in the middle of the zipper (that is not so close to the teeth this time.) You should end up with something that looks like this. (If I was doing this again I think I would sew even further away from the zipper - I was too close this time)
Open up the zipper ....... so that it is within the opening you have created.
........ and carefully secure the zipper in place at each end with a few machine stitches.
Nearly there! Carefully unpick the tacking stitches.......
....and cut off the excess zip at each end.
Lightly press and that's it you've inserted a zip!
Well I hope that's helpful I've tried to use pictures rather than words as I think it's easier to follow and whilst I'm not holding myself up as an expert I know what works for me. Like with most things the more you practice the easier it becomes and you'll adapt methods to suit your own style of sewing.
Well whilst doing this I've just sold a couple of things on Ebay so I'm off to make someone happy (I hope!)
Happy Sewing


Hi Caroline, thank you for the tutorial. I'm hopeless at putting in zips so all help and advice is gratefully received. I might even have a go this afternoon .......
ReplyDeleteLesley x
Such a good tutorial! And I did not know about continuous zip - definitely the way to go.
ReplyDeletePomona x
Thank you so much for doing this Caroline, it's brilliant. I didn't know about continous zip either. Definately my homework for this week and from now on I won't have to unpick my cushion covers to wash them! x
ReplyDeleteThanks ladies it was a bit of a rush job but I think you get the idea. Need to think about inserting a concealed zip into a piped cushion now - ooooh it's enough to make your eyes water
ReplyDeleteCaroline x
Thanks so much Caroline - have always avoided the dreaded zip - but your great tutorial gives me confidence to try!
ReplyDeleteEither I've forgotten how to do a zip or that is a totally new method to me. It looks a lot easier than the method I use.
ReplyDeleteLikewise I've never heard of a continuous zip, sounds great to keep in the sewing box.
Thanks for the tutorial Caroline! Don't hate putting in zips too much, but this method using the continuous zip looks great - never knew they existed!
ReplyDeleteThanks for your comments on my posts!
Gill x
I love Merrick & Day, brilliant value cushions and their customer service is second to none.
ReplyDeleteFirst time I have seen a continuous zip and am really impressed by it and your tutorial. My personal bete noire is bound buttonholes... I can still see that brown shirt dress... shivers!
Great tutorial, really neat finish, I've never been confident with zips but you make it look so much easier this way.
ReplyDeleteThank you for sharing
Jan x
As someone who doesn't know the first thing about sewing I take my hat off to you! I didn't know about the continuous zip but then again, I didn't know about any other kind of zip either!
ReplyDeleteThis looks like a great method, I've just had a mare putting a zip into a bodice for my birthday dress so it's great to have some hints and tips! I'll be bookmarking this one!!
ReplyDeleteThanks for this tutorial, I always dread putting in zips. You wouldn't believe the number of ways I've come up with to fasten things to avoid using a zip.
ReplyDeleteHello to every one, the contents present at this web
ReplyDeletesite are in fact awesome for people experience, well, keep up the good work
fellows.
Visit my homepage; Cheap Jerseys